
Where to Start
The HiTechHomestead ecosystem is structured very intentionally to make it easy for you to dip your toes in the water of homestead/farm automation without a major up-front investment. You can try different parts of the system out and see what works on your farm and what doesn’t. While there is technically a whole continuum of possibilities along this progression, we have broken things down into three primary stages to try to keep it simple.
Read on to get familiar with how the HTH progression is shaping up, but be aware that none of these Stages are quite ready to officially roll out yet. If you are interested in being an early beta tester or just want to know was soon as the demo is ready, please subscribe! My goal is to have everything ready for a soft-launch some time in early 2026.
All of the stages described below use a relatively new type of radio module called a LoRa transceiver to provide long range data transmission of very small data packets (compared to WiFi or LTE) using very little battery power. The radios operate in unlicensed ISM radio bands similar to WiFi and Bluetooth, so anyone can buy a radio module and start using it without having to get a license or approval from the FCC.
TLDR
To distill this page down into simple takeaways, my recommendations are (in order):
Jump directly to Stage 3 if you can. The upfront cost (both time and money) is higher and requires quite a bit more technical hoop jumping. We are working on a walkthrough to take you through the process step-by-step so anyone can do it, but this is _not_ going to be a “get a sensor network deployed in a weekend” path for most people.
If Stage 3 intimidates you, that’s okay! That’s why we’re building Stage 2. The up-front cost to deploy a relatively complete small-scale sensing system using the HTH Toolkit and the HTH Simple LoRa node firmware is significantly lower (and you can re-use the gateway as a sensor when/if you upgrade to Stage 3 - no wasted hardware!). With Stage 2, most people should be able to get a few sensors up and running in an afternoon all reporting back to a simple live dashboard display.
Don’t trust me yet!? Good! I probably wouldn’t buy anything from some random internet guy either… That’s why we have Stage 1 and why we’re giving it away for free! Go buy a couple Meshtastic modules (we have specific ones listed in the detailed build guide that is coming soon) and try out the HTH firmware and toolkit demos. You should be able to get to that magic “it worked!” moment pretty quickly because the demo is pre-tuned to keep things simple and the walkthrough guides you through every step in detail. If for some reason, it doesn’t work, you can always flash your node back to Meshtastic and use it for some off-grid/backup communication between you and your neighbors.
Read on for more details on what is planned for each individual stage and some more of the why behind them. If you want to join the cause and help us decide where to focus our attention, consider filling out our short survey about which stage fits your needs the best so we can spend our time where it helps the most people!
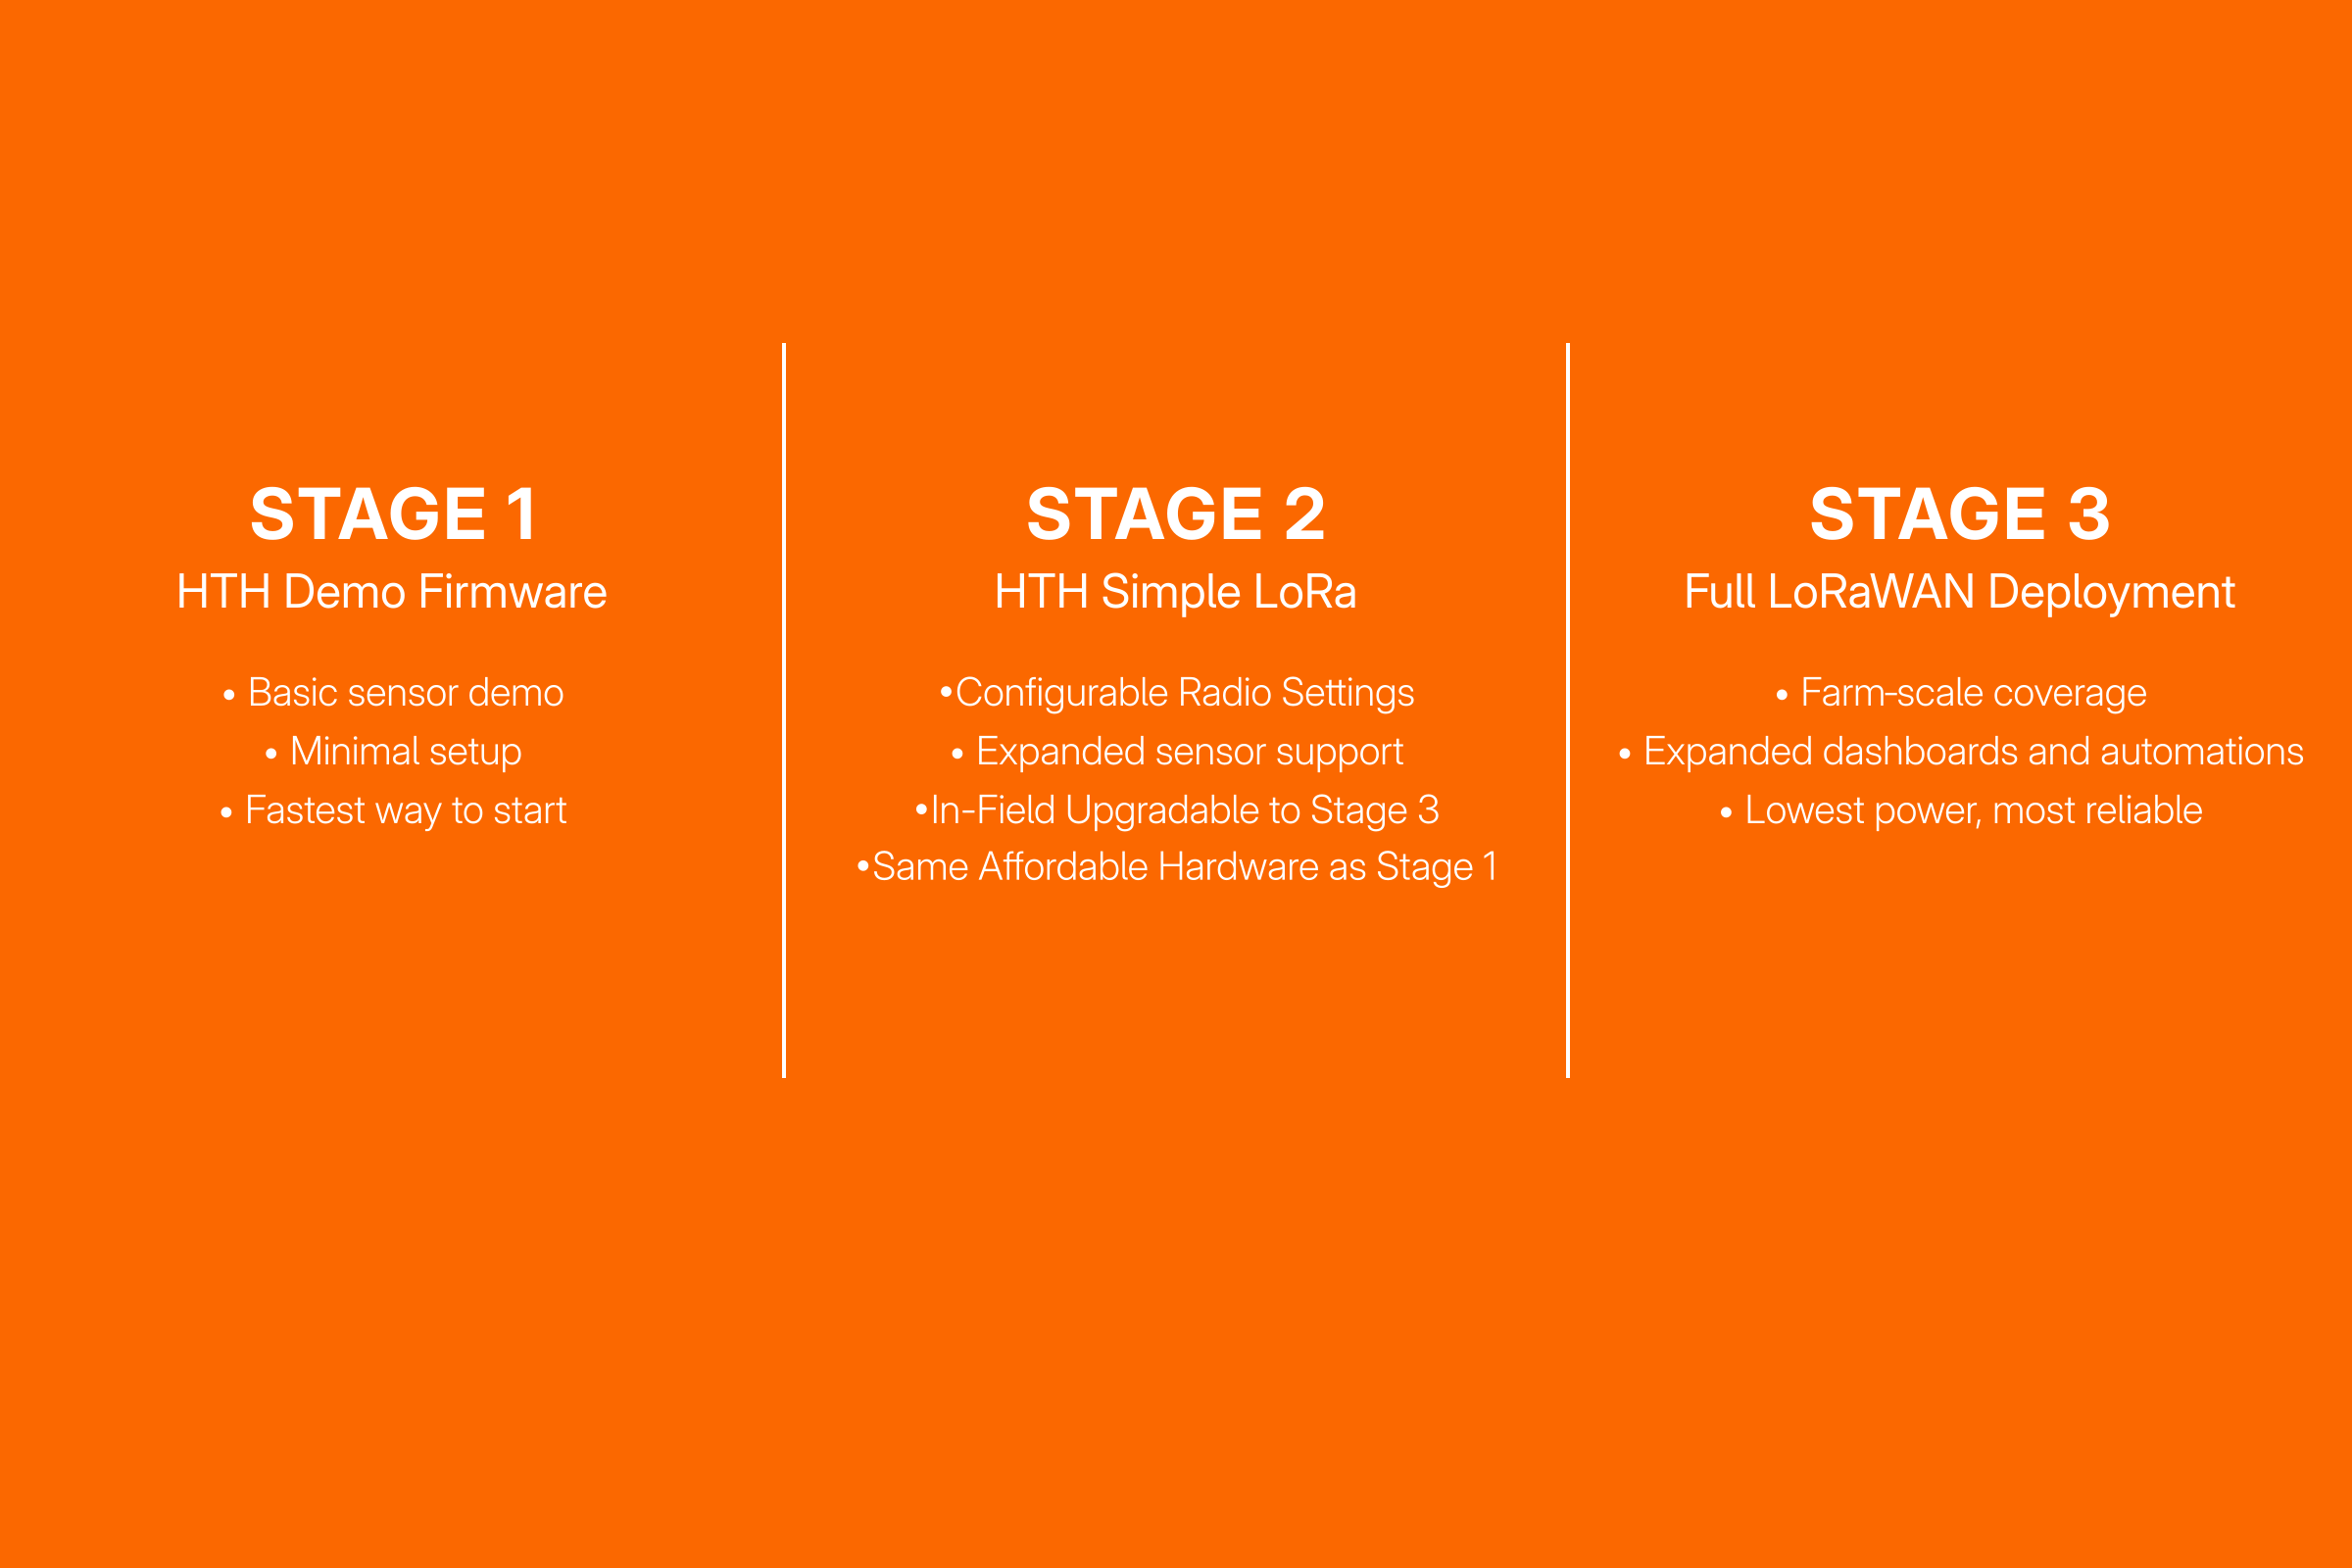
Stage 1: Simple LoRa Demo
This is the easiest and fastest way to get started with HiTechHomestead. Using the free HTH Demo Firmware, you can have a basic long-range sensor online in minutes with nothing more than two inexpensive LoRa-based modules (exact hardware and supplier links will be provided in the free guide - coming soon!). One device acts as a simple sensor node that periodically transmits temperature and humidity data, and the other acts as a USB-connected “gateway” that feeds those packets into the HTH Toolkit dashboard running on your desktop computer.
The demo firmware uses a minimal point-to-point LoRa link designed to give you an immediate, satisfying “this works!” moment before committing to a larger system.
For very simple deployments, the demo is probably good enough to meet your needs but there are limitations to be aware of. Radio parameters (frequency, spreading Factor (SF), sleep intervals) are hard coded for balance between range and battery life, but may struggle for installs with nodes far from a gateway with weak signal. The demo has very little support for configuration customization or different sensors. If you just need a simple temperature and humidity sensor, and range and sensor density is no issue for you, then the simple demo is all you really need. Please feel free to use it forever, free of charge.
The demo is deliberately simple: an easy hands-on introduction to long-range wireless sensing. It’s the quickest way to flash firmware, hook up a temperature sensor, and watch real data appear in the Toolkit dashboard. Once you get comfortable and want better battery life, more sensors, or future upgrades to more advanced deployments, you’ll want to check out Stage 2 or Stage 3.
Stage 3: HTH Node Firmware - Full LoRaWAN Operation
Yes, I know that putting Stage 3 here is out of order. But you need some of this information before you can really understand the benefit of why we even have a Stage 2 in the first place, so please indulge me just for a moment.
LoRaWAN has become well-established as the defacto industry standard for large scale sensing networks built with LoRa radios. LoRaWAN defines common packet formats and network access behaviors that allow for very low power operation and serving many thousands of devices in a single deployment. LoRaWAN systems support both uplink and downlink behavior without notable impacts on battery performance. The network definition has been so successful that there are a number of commercial and community-based operators that have been deploying nation-wide (and in some cases global) LoRaWAN networks, and devices can even roam between networks if the operators have configured support.
In my opinion, the coolest thing about LoRaWAN is that you can build your own private LoRaWAN network using freely-available open-source software and some special hardware called a “LoRa concentrator”. A concentrator serves the same role as the single-channel gateways we use in Stages 1 & 2, but the thing that makes it special is that a concentrator can actively listen on 8 (eight!?) channels and all spreading factors at the same time. This significantly improves network efficiency on both airtime and power usage. With a proper concentrator, each node in the network can use the SF that is best suited for its location, so nodes with better signal to the gateway will use lower SF, consume less airtime, and less power overall. The nodes further from the gateway can automatically adapt their SF higher as-needed so that they use the lowest SF that allows for reliable data throughput.
Going full LoRaWAN is really the only way to go for even a modest sensor deployment, and is my preferred method on the homestead. The main drawback with going this route is higher initial cost and increased system complexity. An entry-level concentrator runs in the ballpark of $100 - $150, and needs to be paired with a dedicated server machine running Linux that can run the backend software stack. If you can afford it, this is where you should start right out of the gate. Once the system is up and running it will work significantly better in the long run than either of the other setups.
That said, not every farm needs all of the features of a full LoRaWAN system, and the initial time and financial investment is non-trivial for many small operations. This is why we’re building Stage 2.
Stage 2: HTH Node Firmware - Simple LoRa Mode
The HTH Node Firmware is designed such that you can purchase a couple of very low cost end-node devices running Meshtastic (Stage 1) and get a taste of what a system like this could do on your farm. Stage 1 is intentionally limited to facilitate quick and easy deployments. If you need more functionality than Stage 1 provides, but Stage 3 feels intimidating, then Stage 2 is probably the right place to start!
In Stage 2, you follow a very simple procedure to reprogram the firmware on both of the end devices to the full HTH Node Firmware which unlocks a number of additional features:
Support for simple downlink messages from the gateway to the sensor node
Arbitrarily configurable sending intervals down to 10 seconds
Support for custom sensors with homestead/farm applications
Lower power usage than Stage 1
No additional hardware cost over Stage 1 and significantly more affordable to get started that Stage 3
Stage 2 is still limited compared to a full Stage 3 LoRaWAN deployment based on open source hardware. It is a great bridge to get you up and running quickly, and may meet your needs for a long time, but eventually you will be best served moving to Stage 3. Drawbacks of Stage 2 compared to Stage 3 (ie. why you shouldn’t stay here forever)
Single channel & SF for entire deployment reduces overall network capacity and battery optimization
Slightly higher power usage than Stage 3
Site password security model is less robust than proper LoRaWAN
Only records/saves sensor data when your PC is running the HTH Toolkit